Prints pack
Prints Editor
You can see an example here.
One of the features of the editor is that when the user uploads images, the EXIF information is read from each file to determine the orientation in which the image was taken, allowing it to be displayed vertically or horizontally on the screen.
Depending on the product size, if the customer’s images do not have the adequate proportion, they will be shown cropped on the screen by default. The customer is allowed to fit or crop all images, or edit them individually and select the fit option for the photos they deem appropriate.
When the customer selects the fit option, zooming or moving the image sideways is not allowed, and the margins are shown on the screen exactly as the printed photo will look.

Product Variants
We can create a Prints product called “Standard Copies” and add different variants that we will call “Sizes,” which could be the different copy sizes we want to offer for this product. Each variant will have a different size and a different price.

Price Model
We can use 2 different ways to configure prices:
- Pack (price/pack): Allows configuring different pack ranges, and a price can be assigned to each pack.
- Unit (price/unit): We can add a scaled tariff in segments where the unit price of each copy can be configured based on the number of copies requested.
Prices per pack
Allows configuring one pack or different pack ranges with a different price in each pack.
Using the add option, we can configure as many pack ranges, with their respective prices, as we want to offer the customer for this product.
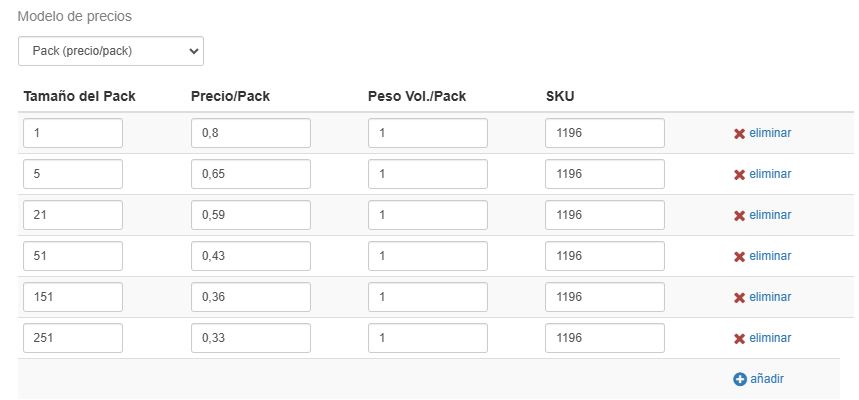
For example, if you have a product configured with a pack of 1 and a pack of 5 copies, the user will have to attach 1 or 5 photos to complete one of the packs. If, for example, 4 images are attached, the program will show a warning to select the rest of the missing images (1 image up to the pack of 5).
Prices per unit
We can add a scale in the form of segments where we can configure the unit price of each copy according to the number of copies requested.
Every time we add a new segment, we only need to modify the “from” value of the new segment to finish configuring it. The system will automatically add the “to” value with the maximum number of copies we have configured.

In the image, we can see the first range goes from 1 to 4 and the second from 5 to 20.
The user can attach **1, 2, 3, or 4 images at a price of €0.8 per unit** in the case of the first range. For the second, they can attach **from 5 to 20 photos at a price of €0.65 per unit.**
Frames or Borders
This option allows you to configure whether the product can have white or black margins of 5 or 10 mm and the no-margin option.
All texts can be customized to make them clearer for the customer.

This option affects the final finish of the image to be printed and allows the customer to select whether the images should be printed with a margin, the color (white or black), and the width of the selected margin. The color and width of the margin selected by the customer will be received drawn in the file to be printed.
If the customer selects a white or black margin, the margin color is also represented on the screen, and the customer can see how their photo will look.


Here is an example of a **Printspack** with different sizes: