How to set up a personalized page
To create a new personalized page, you must do it from your store’s administration panel. Remember that you can access this panel by adding the termination /admin to your website’s link, for example: printspot.io/mi-tienda/admin.
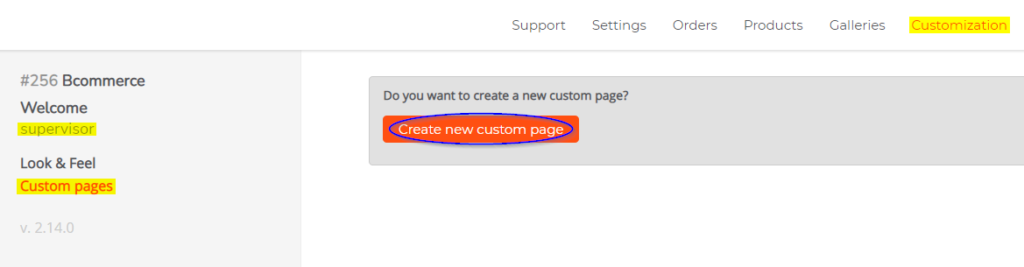
You will know that you have logged in correctly if your user appears on the left sidebar of the panel (in our case, a supervisor user). After logging into the panel, go to the Customization menu in the top navigation bar and, once there, click on the Personalized Pages section in the left sidebar.
Next, click the highlighted option in the following image to create a new personalized page:
Create New Personalized Page
jjjj
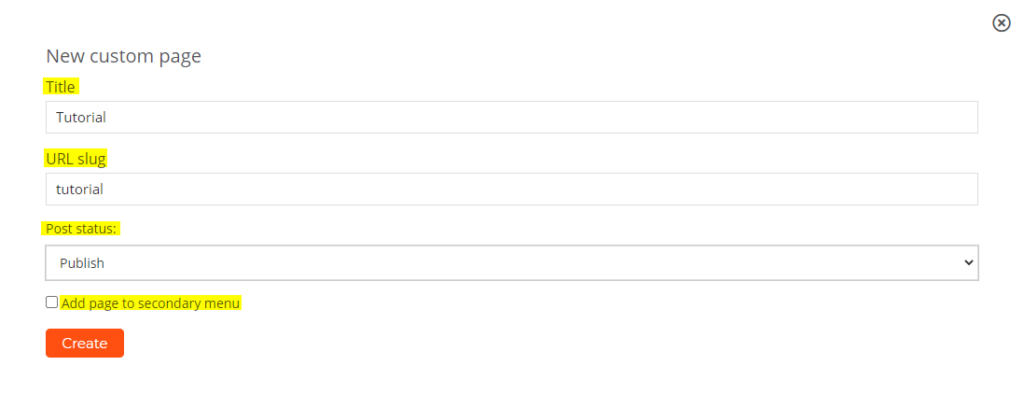
In this option, you can define the requirements that the PDF file must meet so that it can be processed. Below, you can see a brief explanation of each section you can configure:
- Title: in this section, you must specify the title for the personalized page.
- URL Slug: here you must specify the slug that the new personalized page will have. The slug is the name that will be added after your store’s URL, following the following structure: printspot.io/mi-tienda/slug
- Publication Status: in this section, you can set the publication status. You can choose between two different statuses: Published (visible to everyone) or Draft (only visible
- Add Page to Secondary Menu: if you want to set your product’s price to be calculated per page.
Edit a Personalized Page
When clicking Edit
Edit Content in Visual Editor
jjjj
Delete a Personalized Page
jjjj